
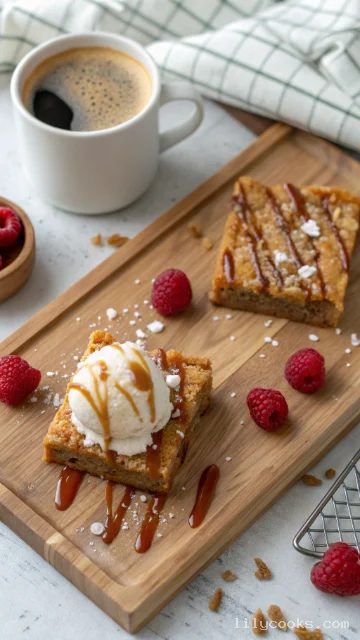
There is something truly magical about the aroma of brown sugar and butter melting together in the oven. It fills your kitchen with a warm, comforting hug that promises something delicious is on its way. These Butterscotch Bars are the epitome of that cozy feeling. They are the perfect cross between a chewy cookie and a dense, fudgy brownie, but with that distinct, deep caramel flavor that only butterscotch can provide.
Recipe Overview
These Butterscotch Bars are all about rich flavor and the perfect texture. The base is buttery, soft, and chewy with slightly crisp edges, studded throughout with pockets of melty butterscotch chips. This one-bowl recipe comes together in no time and requires no chilling, making it a fantastic last-minute dessert. The combination of brown sugar and butter gives these bars their signature deep, caramelized flavor, while a hint of vanilla and salt enhances all the sweet notes. They are simple enough for a beginner baker to master, yet so delicious that even a seasoned pro will be impressed.
Ingredients List
- 1/2 cup (1 stick) unsalted butter, melted: Melted butter is the foundation of this recipe. It creates a dense, chewy texture and a rich, buttery flavor. Using unsalted butter allows you to control the salt level perfectly.
- 1 cup packed light brown sugar: This is the heart of the butterscotch flavor. Brown sugar’s molasses content gives these bars their deep, caramel-like taste and helps create a wonderfully chewy texture.
- 1 large egg, room temperature: A room-temperature egg incorporates more easily into the batter, ensuring a smooth, homogenous mixture and a tender crumb.
- 2 teaspoons vanilla extract: Pure vanilla extract elevates the flavors of the butter and brown sugar, adding a warm, aromatic note.
- 1 cup all-purpose flour: This provides the structure for the bars.
- 1 teaspoon baking powder: This leavening agent gives the bars a slight lift, preventing them from becoming too dense or flat.
- 1/2 teaspoon salt: A pinch of salt is crucial! It cuts through the sweetness and intensifies all the other flavors, making the butterscotch taste even more pronounced.
- 1 1/2 cups butterscotch chips, divided: The star of the show! Butterscotch chips provide intense flavor and gooey pockets of melted sweetness throughout the bar. Melting half of them into the batter intensifies the flavor, while folding the rest in whole gives you those glorious, gooey bites.
Step-by-Step Instructions
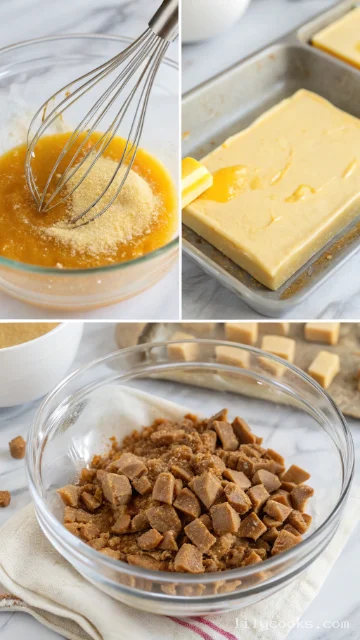
- Prep and Preheat: Get your oven preheating to 350°F (175°C). While it warms up, line an 8×8-inch square baking pan with parchment paper. Leave some overhang on two opposite sides – this will be your secret weapon for lifting the bars out of the pan later. Greasing the pan is unnecessary with the parchment paper, but a light spritz of non-stick spray on the paper helps ensure nothing sticks.
- Combine Wet Ingredients: In a large mixing bowl, pour in the melted butter. Add the brown sugar and whisk vigorously until the mixture is smooth and well combined. It should look like wet sand. Whisk in the room-temperature egg and the vanilla extract until the batter is glossy and cohesive.
- Add Dry Ingredients: Sprinkle the flour, baking powder, and salt over the wet ingredients. Use a rubber spatula or a wooden spoon to gently fold the dry ingredients into the wet. Mix just until a few streaks of flour remain. This is the secret to a tender bar.
- Melt and Fold the Chips: Place 1/2 cup of the butterscotch chips in a small, microwave-safe bowl. Microwave in 15-second intervals, stirring in between, until completely smooth. Pour this melted butterscotch into the batter and fold it in until the batter is a uniform, rich caramel color. Now, gently fold in the remaining 1 cup of butterscotch chips until they are evenly distributed.
- Bake: Pour the thick batter into your prepared pan and use the spatula to spread it into an even layer. The batter will be sticky, so take your time to get it to the corners. Place the pan on the center rack of your oven and bake for 25-30 minutes.
- Test and Cool: The bars are done when the edges are a deep golden brown and a toothpick inserted into the center comes out with just a few moist crumbs clinging to it. Avoid overbaking, as this will make the bars dry and crumbly. Let the pan cool completely on a wire rack before even thinking about cutting. This allows the bars to set up perfectly.
Tips for Success
- Use Fresh Ingredients: The best flavor comes from fresh brown sugar, which is soft and moist, and fresh baking powder. Check the expiration date on your baking powder for the best rise.
- Don’t Overmix: This is the golden rule! Overmixing the batter develops gluten, which will result in tough, dense bars. Mix just until the ingredients are combined for a tender, chewy crumb.
- Test for Doneness: The toothpick test is your best bet. Look for a few moist crumbs, not wet batter. The bars will continue to set as they cool.
- Line Your Pan Well: Using parchment paper with overhangs is the easiest way to remove the bars from the pan perfectly. You can lift the entire block out and cut it into neat squares without any struggle.
- Use Quality Chips: While any brand will work, investing in a good-quality butterscotch chip with a high butterfat content will yield a richer, more luxurious flavor.
Serving Suggestions
These Butterscotch Bars are delightful all on their own, but there are plenty of ways to elevate them. Try serving a warm bar with a scoop of creamy vanilla bean ice cream and a drizzle of warm caramel sauce for a decadent sundae. For a simple, elegant presentation, dust the cooled bars with a light sprinkling of flaky sea salt just before serving—the contrast of sweet and salty is divine. Pair these bars with a strong cup of coffee, a glass of cold milk, or a comforting mug of chai tea. You can also cut them into small, bite-sized squares and arrange them on a platter with fresh berries for a stunning dessert board. They are a fantastic addition to any holiday cookie tray or after-school snack.
Storage Tips
- Room Temperature: Store your cooled Butterscotch Bars in an airtight container at room temperature for up to 5 days. To keep them soft, place a slice of plain bread in the container; it will absorb excess moisture.
- Refrigeration: Refrigeration is generally not recommended as it can make the bars dry out faster, but if your kitchen is very warm, they will keep for a week in a sealed container in the fridge. Let them come to room temperature or warm them up before serving.
- Freezing: These bars freeze beautifully! Wrap individual bars tightly in plastic wrap, then place them in a freezer-safe bag or container. They will keep for up to 3 months. To enjoy, thaw at room temperature or pop them in the microwave for a few seconds for a warm, fresh-from-the-oven taste.
Can I use light brown sugar instead of dark?
Yes. Dark brown sugar will give you a deeper, more intense molasses flavor, while light brown sugar produces a milder, slightly less rich butterscotch taste. Both will work perfectly.
Can I add nuts to this recipe?
Absolutely. Toasted pecans or walnuts are a wonderful addition. Stir in about 1/2 cup of chopped nuts with the dry ingredients for a delightful crunchy texture.
My bars are too gooey in the middle. What went wrong?
The bars are likely slightly underbaked. Ensure your oven is properly calibrated and bake for the full time until the center is set. Let them cool completely for the best texture.
Can I double the recipe?
Yes, you can easily double this recipe. Bake it in a 9×13-inch pan, but increase the baking time by about 5-10 minutes, keeping an eye on it and testing for doneness with a toothpick.
What if I don’t have butterscotch chips?
You can substitute with chocolate chips or peanut butter chips for a different flavor profile. For a classic butterscotch, you can also melt down store-bought butterscotch candies with a splash of heavy cream to use in the batter.
Conclusion
These Butterscotch Bars truly are a simple pleasure that delivers maximum flavor with minimal effort. Their chewy, buttery goodness is guaranteed to bring smiles to everyone who tries them. They are the kind of recipe that will be passed down through your family, a reliable favorite for every occasion. I encourage you to make a batch, share them with the people you love, and create some sweet memories. Don’t forget to leave a comment and tell me how yours turned out!
butterscotch bars recipe
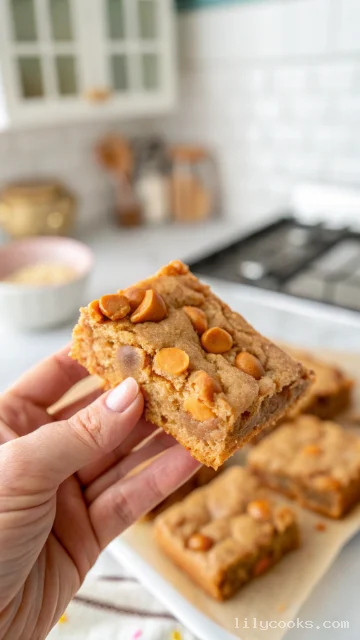
These Butterscotch Bars are all about rich flavor and the perfect texture. The base is buttery, soft, and chewy with slightly crisp edges, studded throughout with pockets of melty butterscotch chips. This one-bowl recipe comes together in no time and requires no chilling, making it a fantastic last-minute dessert. The combination of brown sugar and butter gives these bars their signature deep, caramelized flavor, while a hint of vanilla and salt enhances all the sweet notes. They are simple enough for a beginner baker to master, yet so delicious that even a seasoned pro will be impressed.
Ingredients
- 1/2 cup (1 stick) unsalted butter, melted: Melted butter is the foundation of this recipe. It creates a dense, chewy texture and a rich, buttery flavor. Using unsalted butter allows you to control the salt level perfectly.
- 1 cup packed light brown sugar: This is the heart of the butterscotch flavor. Brown sugar’s molasses content gives these bars their deep, caramel-like taste and helps create a wonderfully chewy texture.
- 1 large egg, room temperature: A room-temperature egg incorporates more easily into the batter, ensuring a smooth, homogenous mixture and a tender crumb.
- 2 teaspoons vanilla extract: Pure vanilla extract elevates the flavors of the butter and brown sugar, adding a warm, aromatic note.
- 1 cup all-purpose flour: This provides the structure for the bars.
- 1 teaspoon baking powder: This leavening agent gives the bars a slight lift, preventing them from becoming too dense or flat.
- 1/2 teaspoon salt: A pinch of salt is crucial! It cuts through the sweetness and intensifies all the other flavors, making the butterscotch taste even more pronounced.
- 1 1/2 cups butterscotch chips, divided: The star of the show! Butterscotch chips provide intense flavor and gooey pockets of melted sweetness throughout the bar. Melting half of them into the batter intensifies the flavor, while folding the rest in whole gives you those glorious, gooey bites.
Instructions
- Prep and Preheat: Get your oven preheating to 350°F (175°C). While it warms up, line an 8x8-inch square baking pan with parchment paper. Leave some overhang on two opposite sides – this will be your secret weapon for lifting the bars out of the pan later. Greasing the pan is unnecessary with the parchment paper, but a light spritz of non-stick spray on the paper helps ensure nothing sticks.
- Combine Wet Ingredients: In a large mixing bowl, pour in the melted butter. Add the brown sugar and whisk vigorously until the mixture is smooth and well combined. It should look like wet sand. Whisk in the room-temperature egg and the vanilla extract until the batter is glossy and cohesive.
- Add Dry Ingredients: Sprinkle the flour, baking powder, and salt over the wet ingredients. Use a rubber spatula or a wooden spoon to gently fold the dry ingredients into the wet. Mix just until a few streaks of flour remain. This is the secret to a tender bar.
- Melt and Fold the Chips: Place 1/2 cup of the butterscotch chips in a small, microwave-safe bowl. Microwave in 15-second intervals, stirring in between, until completely smooth. Pour this melted butterscotch into the batter and fold it in until the batter is a uniform, rich caramel color. Now, gently fold in the remaining 1 cup of butterscotch chips until they are evenly distributed.
- Bake: Pour the thick batter into your prepared pan and use the spatula to spread it into an even layer. The batter will be sticky, so take your time to get it to the corners. Place the pan on the center rack of your oven and bake for 25-30 minutes.
- Test and Cool: The bars are done when the edges are a deep golden brown and a toothpick inserted into the center comes out with just a few moist crumbs clinging to it. Avoid overbaking, as this will make the bars dry and crumbly. Let the pan cool completely on a wire rack before even thinking about cutting. This allows the bars to set up perfectly.