
Get ready to thrill your guests with these fun Halloween finger foods that bring the spooky spirit to life. Perfect for parties, potlucks or family gatherings, these bite-sized treats mix creepy designs with delicious flavors everyone craves.
You’ll love how simple they are to make, turning ordinary ingredients into eerie delights that spark smiles and screams of joy.
Recipe Overview
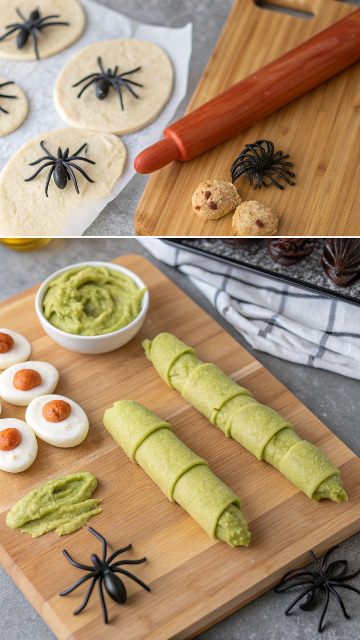
These Halloween finger foods shine with bold flavors and playful textures – think savory crunch from mummy hot dogs wrapped in flaky dough, sweet crispiness in green witch finger cookies, and creamy tang in deviled egg eyeballs. Prep them in under 30 minutes each, with minimal cooking, making them ideal for last-minute spooky snacking.
Preparation time: 20-30 minutes per recipe
Cooking time: 10-15 minutes per recipe (varies by item)
Ingredients List
For Mummy Hot Dogs (makes 12):
- 12 hot dogs: Choose all-beef for that juicy bite.
- 1 package (8 ounces) crescent roll dough: Provides the flaky, golden wrap mimicking mummy bandages.
- 1 egg, beaten: Helps seal the dough and adds shine.
- Black olives or mustard for eyes: Tiny dots create the spooky gaze.
For Witch Finger Cookies (makes 24):
- 1 cup unsalted butter, softened: Ensures tender, melt-in-your-mouth texture.
- 1 cup powdered sugar: Sweetens without graininess.
- 1 egg: Binds everything for easy shaping.
- 1 teaspoon vanilla extract: Adds warm depth.
- 2 1/2 cups all-purpose flour: Forms the sturdy base.
- 1 teaspoon baking powder: Keeps them light.
- Green food coloring: Gives that eerie witch skin hue.
- 24 whole almonds: Pressed in as gnarly nails.
- Red jam for “blood”: A sticky touch for realism.
For Deviled Egg Eyeballs (makes 12):
- 6 large eggs, hard-boiled: Fresh ones peel smoothly for creamy yolks.
- 3 tablespoons mayonnaise: Creates smooth, rich filling.
- 1 teaspoon mustard: Adds sharp tang.
- Salt and pepper to taste: Balances flavors.
- Black olives for pupils: Sliced thin for creepy eyes.
- Red food coloring or paprika: Veins for bloodshot effect.
Step-by-Step Instructions
Start with Mummy Hot Dogs: Preheat your oven to 375°F. Unroll the crescent dough and cut into thin strips – imagine wrapping a real mummy. Wrap each hot dog with strips, leaving a small gap for the face, and brush with beaten egg for that golden crisp. Bake for 12-15 minutes until dough puffs and browns, then dot on olive eyes with toothpicks for a spooky stare that pops with savory warmth.
Next, Witch Finger Cookies: Cream butter and powdered sugar until fluffy, then mix in egg, vanilla and green food coloring for that vibrant, eerie shade. Stir in flour and baking powder to form dough – it should feel soft yet firm. Shape into finger-like logs, press an almond at one end for the nail, and score knuckles with a knife. Bake at 350°F for 10-12 minutes until edges crisp lightly, then dab jam at the base for “blood” while warm, yielding crunchy, sweet fingers with a buttery snap.
Finally, Deviled Egg Eyeballs: Slice hard-boiled eggs in half, scoop out yolks and mash with mayo, mustard, salt and pepper for a creamy, tangy filling that bursts with flavor. Pipe back into whites, top with olive slices for pupils, and draw red veins with food coloring on a toothpick – chill briefly so they hold shape, delivering cool, smooth bites with a zesty kick.
Tips for Success
Use room-temperature ingredients for smoother mixing in cookies to avoid lumps. Watch baking times closely to prevent over-browning that dulls the spooky colors. Test hot dogs for doneness by checking if dough feels firm. Prep ahead by assembling but bake fresh for maximum crunch and warmth.
Serving Suggestions

Arrange these Halloween finger foods on a themed platter – scatter mummy hot dogs amid “cobwebs” of cheese strings, line up witch fingers on a cauldron plate, and cluster eyeballs for a ghoulish gaze.
Pair with dipping sauces like ketchup “blood” or guacamole “slime” to amp up the fun. For presentation, add dry ice fog or glow sticks nearby to make your spread Instagram-worthy and immersive.
Storage Tips
Keep mummy hot dogs at room temperature for up to 2 hours, or refrigerate in an airtight container for 2 days – reheat in oven for crispiness. Store witch finger cookies in a tin at room temp for a week to maintain crunch. Refrigerate deviled egg eyeballs covered for up to 24 hours; avoid freezing as textures soften.
FAQs
Can I make these vegan?
Swap hot dogs for plant-based versions, use vegan dough and butter substitutes, and skip eggs in cookies with flaxseed mix – flavors stay spooky and satisfying.
What if I lack food coloring?
Use matcha powder for green fingers or paprika for red veins – natural options keep it vibrant.
How to scale for a big party? Double ingredients easily, but bake in batches to ensure even cooking and fresh taste.
My dough tears while wrapping – any fix?
Chill dough slightly for better handling, or use puff pastry as a sturdy alternative.
Conclusion
Dive into these Halloween finger foods and watch your gathering turn magical. Give them a try, snap a pic of your creations, and tag us – can’t wait to see your spooky twists!
Halloween Finger Foods

Get ready to thrill your guests with these fun Halloween finger foods that bring the spooky spirit to life. Perfect for parties, potlucks or family gatherings, these bite-sized treats mix creepy designs with delicious flavors everyone craves.
You'll love how simple they are to make, turning ordinary ingredients into eerie delights that spark smiles and screams of joy.
Ingredients
- For Mummy Hot Dogs (makes 12):
- 12 hot dogs: Choose all-beef for that juicy bite.
- 1 package (8 ounces) crescent roll dough: Provides the flaky, golden wrap mimicking mummy bandages.
- 1 egg, beaten: Helps seal the dough and adds shine.
- Black olives or mustard for eyes: Tiny dots create the spooky gaze.
- For Witch Finger Cookies (makes 24):
- 1 cup unsalted butter, softened: Ensures tender, melt-in-your-mouth texture.
- 1 cup powdered sugar: Sweetens without graininess.
- 1 egg: Binds everything for easy shaping.
- 1 teaspoon vanilla extract: Adds warm depth.
- 2 1/2 cups all-purpose flour: Forms the sturdy base.
- 1 teaspoon baking powder: Keeps them light.
- Green food coloring: Gives that eerie witch skin hue.
- 24 whole almonds: Pressed in as gnarly nails.
- Red jam for "blood": A sticky touch for realism.
- For Deviled Egg Eyeballs (makes 12):
- 6 large eggs, hard-boiled: Fresh ones peel smoothly for creamy yolks.
- 3 tablespoons mayonnaise: Creates smooth, rich filling.
- 1 teaspoon mustard: Adds sharp tang.
- Salt and pepper to taste: Balances flavors.
- Black olives for pupils: Sliced thin for creepy eyes.
- Red food coloring or paprika: Veins for bloodshot effect.
Instructions
Start with Mummy Hot Dogs: Preheat your oven to 375°F. Unroll the crescent dough and cut into thin strips – imagine wrapping a real mummy. Wrap each hot dog with strips, leaving a small gap for the face, and brush with beaten egg for that golden crisp. Bake for 12-15 minutes until dough puffs and browns, then dot on olive eyes with toothpicks for a spooky stare that pops with savory warmth.
Next, Witch Finger Cookies: Cream butter and powdered sugar until fluffy, then mix in egg, vanilla and green food coloring for that vibrant, eerie shade. Stir in flour and baking powder to form dough – it should feel soft yet firm. Shape into finger-like logs, press an almond at one end for the nail, and score knuckles with a knife. Bake at 350°F for 10-12 minutes until edges crisp lightly, then dab jam at the base for "blood" while warm, yielding crunchy, sweet fingers with a buttery snap.
Finally, Deviled Egg Eyeballs: Slice hard-boiled eggs in half, scoop out yolks and mash with mayo, mustard, salt and pepper for a creamy, tangy filling that bursts with flavor. Pipe back into whites, top with olive slices for pupils, and draw red veins with food coloring on a toothpick – chill briefly so they hold shape, delivering cool, smooth bites with a zesty kick.