
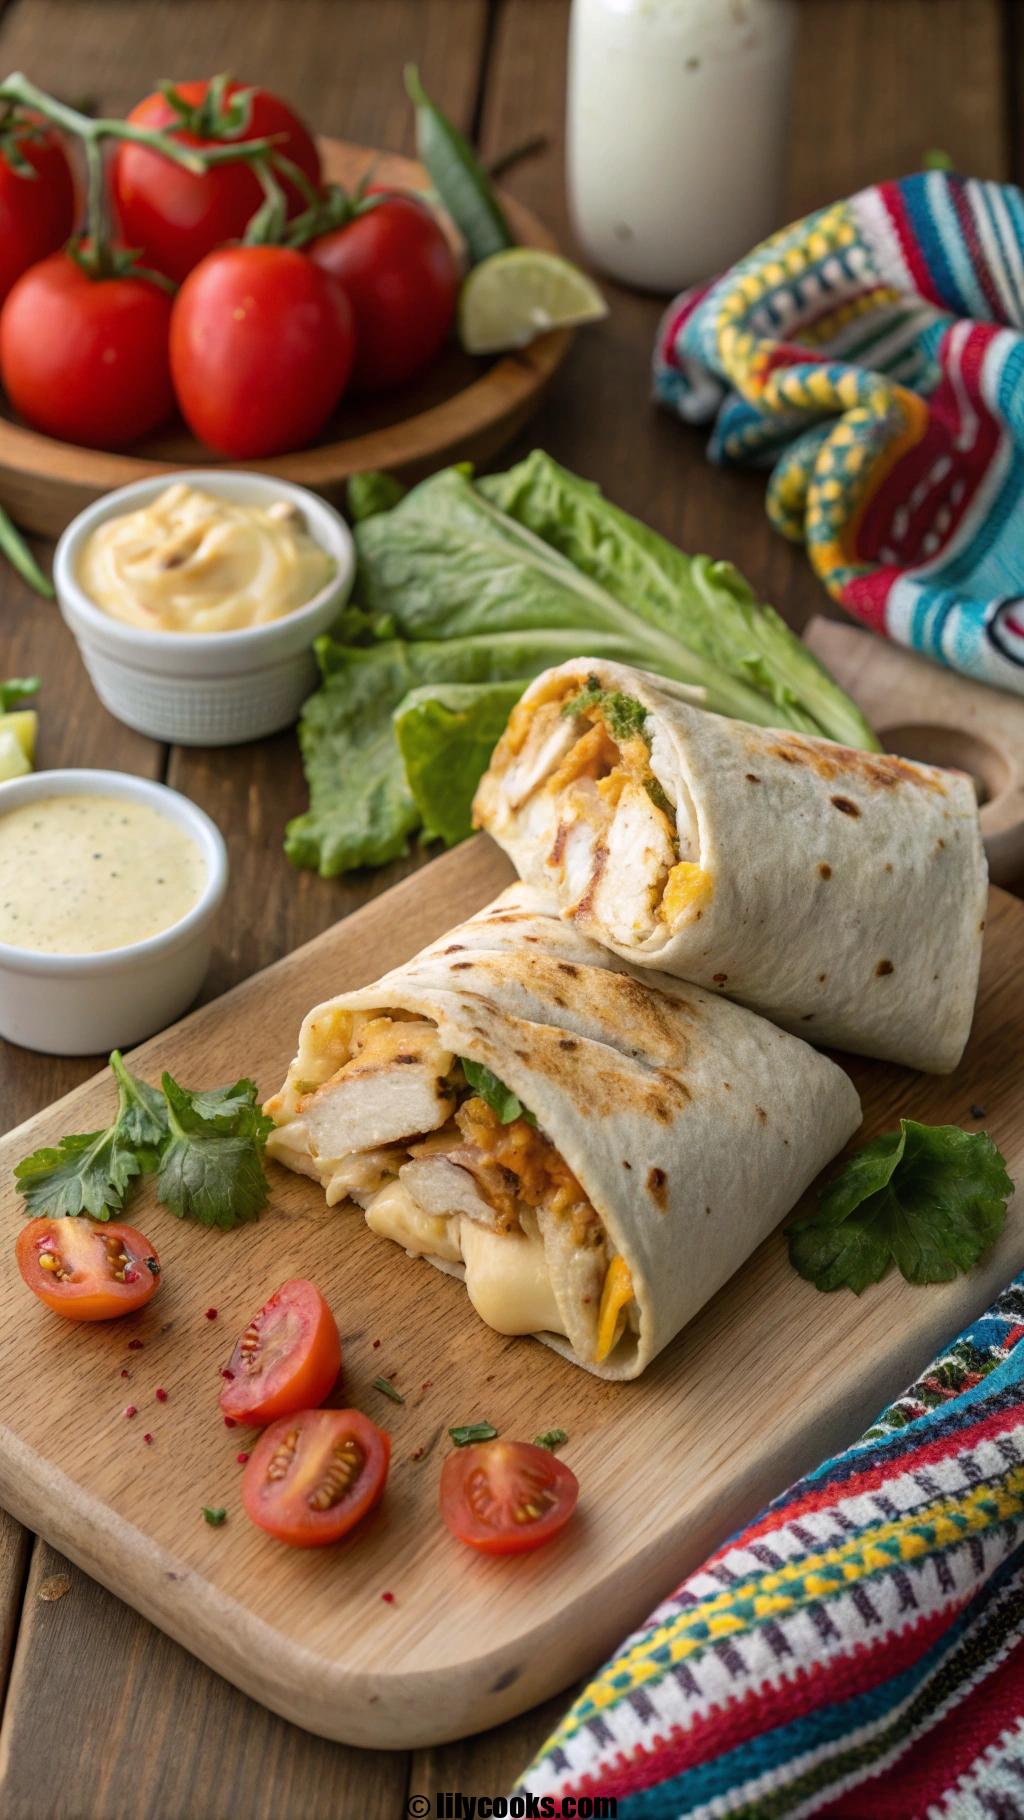
Craving a quick, satisfying meal that’s bursting with flavor? These cheesy garlic chicken wraps are your answer! Perfect for busy weeknights, lunch on the go, or a cozy dinner, this recipe combines tender, garlicky chicken with gooey melted cheese, all wrapped in a soft tortilla.
The savory garlic aroma and creamy cheese will have your kitchen smelling like comfort food heaven. Versatile and easy to customize, these wraps are a hit with kids and adults alike. Let’s dive into this crowd-pleasing dish that’s as fun to make as it is to eat!
Recipe Overview
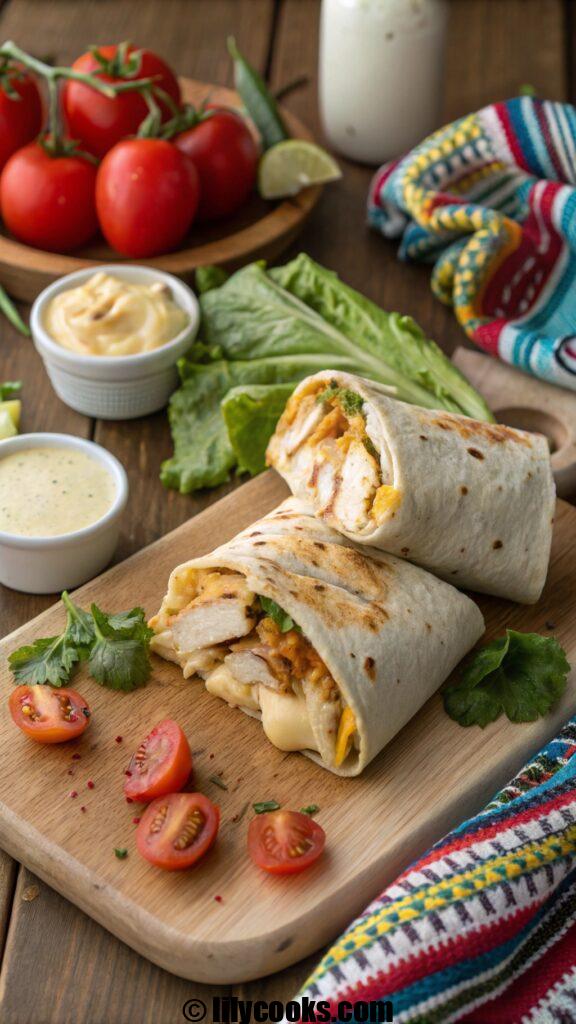
These cheesy garlic chicken wraps are a quick, 30-minute meal with bold flavors. The tender chicken, infused with garlic and herbs, pairs perfectly with melty cheddar and a crisp veggie crunch, all hugged by a warm tortilla. Simple to prepare, endlessly customizable, and perfect for any occasion, this recipe delivers comfort and satisfaction in every bite.
Preparation Time: 15 minutes
Cooking Time: 15 minutes
Total Time: 30 minutes
Servings: 4 wraps
Ingredients List
- 2 boneless, skinless chicken breasts (about 1 lb): Thinly sliced or pounded for even cooking and maximum tenderness.
- 2 tbsp olive oil: Adds richness and helps crisp the chicken.
- 3 cloves garlic, minced: Fresh garlic is key for that bold, aromatic flavor.
- 1 tsp smoked paprika: Brings a subtle smokiness to enhance the chicken.
- 1 tsp dried Italian seasoning: A blend of herbs for a balanced, savory taste.
- Salt and pepper to taste: Elevates all flavors; adjust to preference.
- 1 cup shredded cheddar cheese: Sharp cheddar melts smoothly for that gooey texture.
- 4 large flour tortillas (10-inch): Soft and pliable for easy wrapping.
- 1 cup shredded lettuce: Adds a fresh, crisp contrast to the warm filling.
- 1 medium tomato, diced: Juicy and bright, it adds a pop of color and flavor.
- 1/4 cup ranch dressing or sour cream: Creamy tang ties the wrap together.
- Optional: 1/4 tsp red pepper flakes: For a hint of heat, if desired.
Note: Use fresh garlic for the best flavor—pre-minced can be less potent. Room-temperature tortillas are easier to roll without cracking.
Step-by-Step Instructions
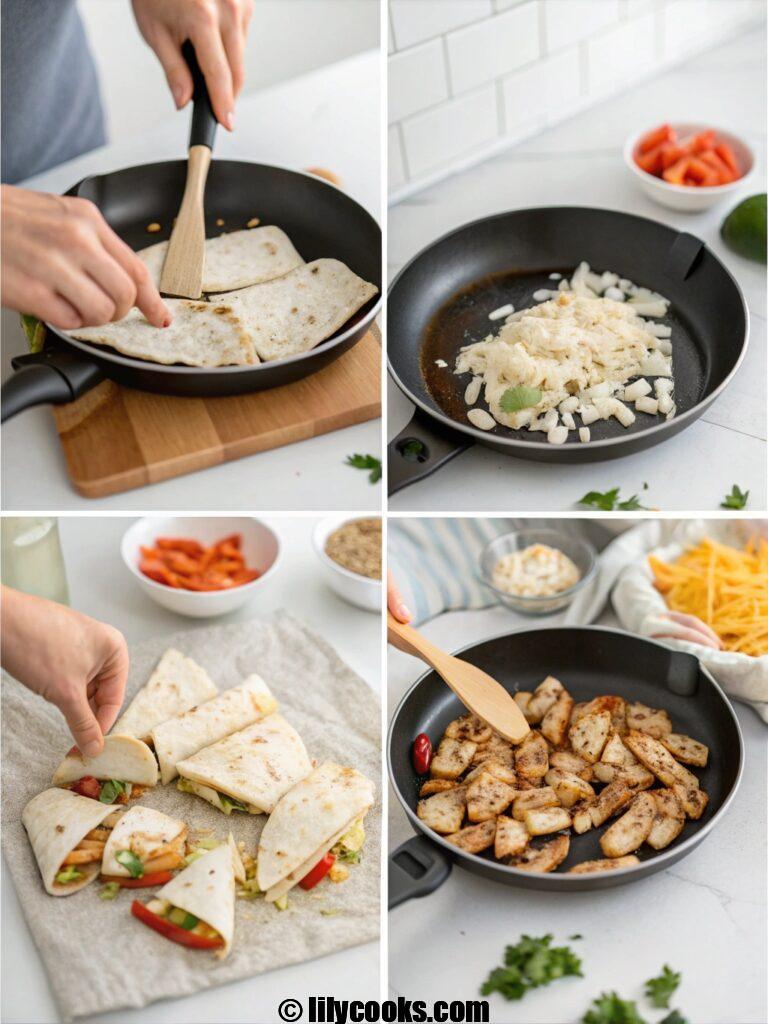
- Prepare the Chicken: Slice chicken breasts into thin strips or pound to 1/4-inch thickness for quick, even cooking. Pat dry with paper towels to ensure a good sear. Season with salt, pepper, smoked paprika, and Italian seasoning.
- Cook the Chicken: Heat olive oil in a large skillet over medium heat. Add minced garlic and sauté for 30 seconds until fragrant, careful not to burn it. Add chicken strips and cook for 4-5 minutes per side until golden and cooked through (internal temp 165°F). If using red pepper flakes, sprinkle them in now. Remove chicken and let it rest for 2 minutes, then slice into bite-sized pieces.
- Assemble the Wraps: Lay a tortilla flat. Spread 1 tbsp ranch dressing or sour cream in the center. Add a handful of shredded lettuce, diced tomato, and a portion of sliced chicken. Sprinkle 1/4 cup shredded cheddar on top.
- Wrap It Up: Fold the bottom of the tortilla up, then fold in the sides and roll tightly to close. Repeat for remaining wraps.
- Toast the Wraps: In the same skillet, place wraps seam-side down over medium heat. Cook for 1-2 minutes per side until golden and the cheese melts, creating a crispy exterior.
- Serve: Slice wraps in half diagonally for a beautiful presentation and serve immediately while warm and cheesy.
Tip: Keep the skillet on medium to avoid burning the tortillas while ensuring the cheese melts perfectly.
Tips for Success
- Don’t Overcook the Chicken: Use a meat thermometer to check for 165°F to keep it juicy.
- Grate Your Own Cheese: Pre-shredded cheese often has anti-caking agents that affect melting. Freshly grated cheddar melts smoother.
- Warm Tortillas: Microwave tortillas for 10 seconds to make them pliable and prevent tearing.
- Customize Fillings: Swap lettuce for spinach or add avocado for creaminess.
- Control Garlic Intensity: Sauté garlic briefly to avoid bitterness; fresh garlic is best for bold flavor.
Serving Suggestions
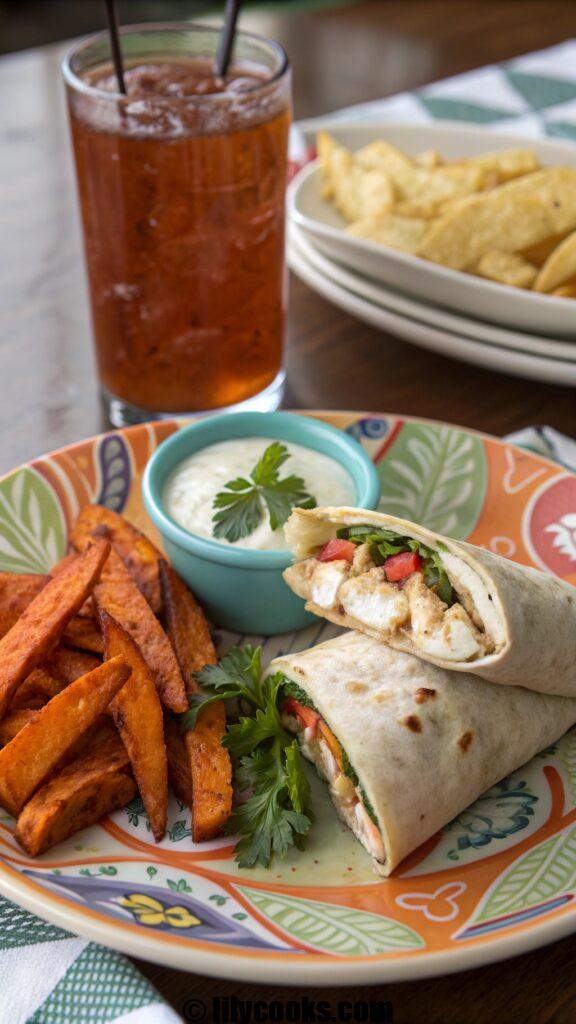
Serve these wraps hot, sliced diagonally to show off the melty cheese and vibrant fillings. Pair with sweet potato fries or a light cucumber salad for a balanced meal. For a party, cut into smaller pinwheel slices for easy appetizers. Drizzle extra ranch or a spicy sriracha mayo for dipping to elevate the experience. A chilled iced tea or sparkling water with lemon complements the rich, garlicky flavors.
Storage Tips
- Room Temperature: Keep assembled wraps at room temperature for up to 2 hours if serving soon.
- Refrigeration: Store cooked chicken and prepped veggies separately in airtight containers for up to 3 days. Assemble wraps just before serving to avoid soggy tortillas.
- Freezing: Freeze cooked chicken in a freezer-safe bag for up to 2 months. Thaw overnight in the fridge before reheating. Avoid freezing assembled wraps, as tortillas can become mushy.
- Reheating: Reheat chicken in a skillet over medium heat for 2-3 minutes. Toast assembled wraps as directed to restore crispiness.
FAQs
Can I use a different protein?
Yes, swap chicken for shrimp, turkey, or tofu. Adjust cooking time to ensure the protein is fully cooked.
What if I don’t have flour tortillas?
Use whole wheat tortillas, pita, or lettuce wraps for a low-carb option. Ensure they’re pliable for easy rolling.
Can I make these wraps ahead of time?
Prep chicken and veggies ahead, but assemble and toast just before serving to keep tortillas crisp.
How can I make it spicier?
Add red pepper flakes, diced jalapeños, or a drizzle of hot sauce to the filling for extra kick.
Can I use a different cheese?
Monterey Jack or mozzarella work great for a milder flavor, but cheddar adds a sharp, tangy bite.
Conclusion
These cheesy garlic chicken wraps are your new go-to for a quick, delicious meal that’s packed with flavor. The combination of garlicky chicken, melty cheese, and fresh veggies is sure to win over your taste buds. Give this recipe a try, and share your creations with us! Your kitchen is about to become the talk of the town.
easter veggie wreath
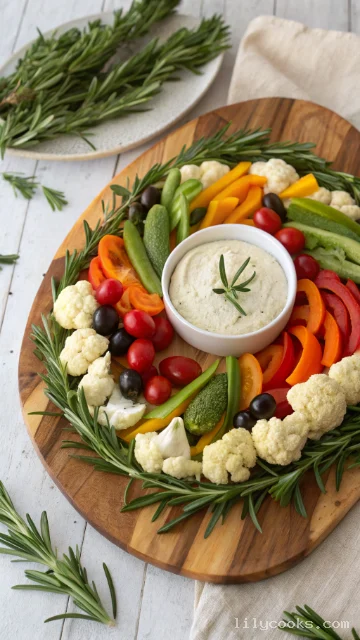
This Easter Veggie Wreath is a no-cook appetizer that combines crisp, fresh vegetables with a creamy, tangy dip. The star of the show is the rainbow of colors—think deep green broccoli, bright red cherry tomatoes, sunny yellow peppers, and vibrant orange carrots—all arranged in a stunning circular pattern. The vegetables offer a satisfying crunch, while the dip adds a cool, herby richness that ties everything together. Preparation is quick and straightforward, making it a perfect choice for both seasoned hosts and kitchen beginners. It is naturally gluten-free and vegetarian, and with a few simple swaps, it can easily become vegan or dairy-free. This recipe serves 8 to 10 people as an appetizer and comes together in just 15 minutes.
Ingredients
- For the Vegetable Wreath:
- 2 cups broccoli florets – Broccoli provides a sturdy, earthy base and beautiful green color. Choose firm, deep-green crowns with tightly closed buds.
- 1 cup cauliflower florets – Cauliflower adds a lovely white contrast and a mild, slightly sweet flavor that pairs well with everything.
- 1 cup cherry tomatoes – These little gems bring bursts of juicy sweetness and vibrant red color. Grape tomatoes work just as well.
- 1 red bell pepper, sliced into strips – Red pepper offers a sweet, crisp bite and a bold pop of color.
- 1 yellow bell pepper, sliced into strips – Yellow pepper brightens the wreath with its sunny hue and adds a slightly fruity flavor.
- 1 cup sugar snap peas – These add a delightful crunch and a fresh, grassy sweetness.
- ½ cup baby carrots, halved lengthwise – Baby carrots bring a tender-crisp texture and a naturally sweet, earthy taste.
- ¼ cup pitted black olives – Olives offer a salty, briny contrast that balances the sweetness of the vegetables.
- 2 sprigs fresh rosemary – Rosemary mimics pine needles for a festive, wreath-like feel and adds a subtle aromatic fragrance.
- ½ cup fresh flat-leaf parsley – Parsley acts as the green "bed" for your wreath, creating a lush, full look.
- For the Dip:
- 1 cup plain Greek yogurt – Greek yogurt forms a creamy, tangy base that is rich in protein. Use full-fat for extra creaminess.
- 2 tablespoons mayonnaise – Mayonnaise adds richness and a velvety smoothness to the dip.
- 1 tablespoon fresh lemon juice – Fresh lemon juice brightens the dip with a citrusy zing that enhances all the vegetables.
- 1 teaspoon Dijon mustard – Dijon mustard gives the dip a subtle sharpness and depth of flavor.
- 2 tablespoons fresh chives, finely chopped – Chives add a mild oniony freshness.
- 2 tablespoons fresh parsley, finely chopped – Parsley in the dip contributes a clean, herbaceous note.
- 1 garlic clove, minced – Garlic provides a savory punch that ties the dip together.
- ½ teaspoon salt – Salt enhances all the flavors and helps the vegetables shine.
- ¼ teaspoon black pepper – Black pepper adds a gentle warmth and subtle heat.
Instructions
Step 1: Prepare Your BaseSelect a large round platter, wooden cutting board, or serving plate. The base should be big enough to accommodate a circular wreath with a hole in the middle for your dip bowl. A 12 to 14-inch diameter works beautifully.
Step 2: Wash and Cut Your VegetablesThoroughly wash all vegetables under cold running water. Pat them dry with a clean kitchen towel or paper towels—excess moisture can make the arrangement soggy. Cut the vegetables into bite-sized, uniform pieces. Slice bell peppers into strips, halve the baby carrots lengthwise, and separate broccoli and cauliflower into small florets. Uniform sizes help the wreath look neat and make it easy for guests to pick up pieces.
Step 3: Create the Parsley BaseArrange a layer of fresh flat-leaf parsley in a circular wreath shape on your platter. This green bed will fill gaps and give your wreath a lush, full appearance. Think of it as the "evergreen" foundation.
Step 4: Build the Wreath LayersStart placing the larger vegetables first. Distribute broccoli and cauliflower florets evenly around the parsley base, forming a sturdy ring. Then, layer the colorful vegetables—cherry tomatoes, red and yellow bell pepper strips, sugar snap peas, halved baby carrots, and black olives—over and around the base. Alternate colors as you go to create a ribbon-like effect. Red, yellow, green, orange—let the rainbow guide you.
Step 5: Add Festive TouchesTuck fresh rosemary sprigs among the vegetables at intervals. The rosemary resembles pine needles and adds a wonderful aromatic touch. Scatter any remaining parsley or herb sprigs around the edges for extra greenery.
Step 6: Prepare the DipIn a medium bowl, whisk together Greek yogurt, mayonnaise, lemon juice, Dijon mustard, chives, parsley, minced garlic, salt, and pepper until smooth and creamy. Taste and adjust seasoning if needed. For the best flavor, let the dip sit in the refrigerator for at least 30 minutes to allow the herbs and garlic to meld.
Step 7: Assemble and ServePlace the bowl of dip in the center of the wreath. The dip bowl acts as the "hole" of the wreath and invites guests to dig in. Serve immediately or chill until ready to enjoy.