
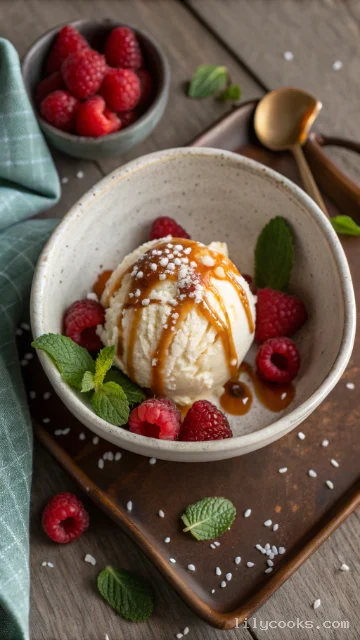
Craving a scoop of pure, homemade happiness? There is nothing quite like the silky, rich taste of ice cream churned fresh in your own kitchen. This homemade ice cream recipe is your ticket to creating a dessert that blows any store-bought pint out of the water. With a base of sweet cream and vanilla, this recipe is a blank canvas for your wildest flavor dreams. It is surprisingly simple to make, requires no special equipment beyond a mixer, and delivers a texture so creamy it will have everyone asking for seconds.
Recipe Overview
This is the ultimate classic vanilla ice cream, designed for creamy perfection and incredible versatility. The preparation is straightforward, making it a fantastic project for beginner and experienced home cooks alike. The result is a luxuriously smooth, scoopable ice cream with a pure, clean vanilla flavor that pairs beautifully with everything from fresh fruit to warm brownies. This recipe is your foundation for endless frozen creations.
Ingredients List
- 2 cups (480 ml) Heavy Cream: This is the heart of your ice cream, providing the rich fat content necessary for a creamy, dense texture and smooth mouthfeel. Do not substitute with light cream or half-and-half.
- 1 cup (240 ml) Whole Milk: Whole milk adds the right amount of liquid without making the mixture too heavy. It balances the richness of the heavy cream for the perfect consistency.
- 3/4 cup (150 g) Granulated Sugar: Sugar does more than sweeten; it lowers the freezing point, ensuring your ice cream stays scoopable and not rock-hard.
- 1 vanilla bean (or 1 tablespoon high-quality vanilla bean paste/extract): The star of the show. Using a real vanilla bean will give you those gorgeous little black specks and an intense, floral aroma that is unmatched. Vanilla bean paste is a fantastic alternative that offers both flavor and those signature specks.
- 6 large egg yolks: The secret to a velvety custard. The yolks act as an emulsifier, creating a smooth, cohesive base and contributing to the incredible richness. Use room-temperature eggs for easier tempering.
- 1/4 teaspoon fine sea salt: Salt is a crucial flavor enhancer that brightens the sweetness and deepens the vanilla notes.
Step-by-Step Instructions
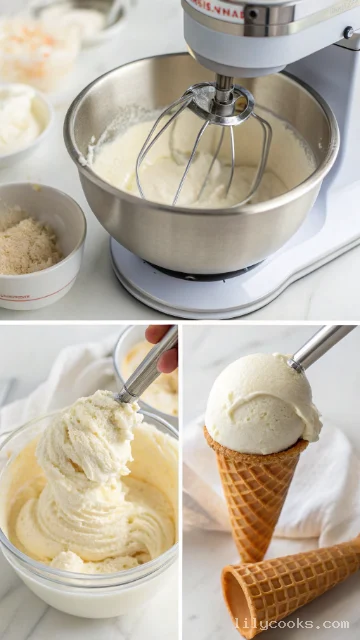
- Chill Your Bowl: Place the bowl of your stand mixer and the whisk attachment in the freezer for at least 15 minutes. This keeps everything cold and helps the cream whip faster.
- Combine Wet Ingredients: In a large mixing bowl, whisk together the heavy cream, whole milk, and vanilla extract until well combined.
- Add the Sugar and Salt: Pour in the granulated sugar and the pinch of salt. Whisk vigorously for 2-3 minutes to ensure the sugar is fully dissolved. You can test this by dipping a clean finger into the mixture; it should feel smooth, not grainy.
- Chill the Base: Cover the bowl and refrigerate the mixture for at least 2 hours, or up to overnight. This chilling step is crucial for a creamy final product. A cold base freezes faster and more evenly, resulting in smaller ice crystals.
- Whip the Cream: Attach the chilled bowl and whisk to your mixer. Pour the cold ice cream base into the bowl. Start mixing on low speed to prevent splashing, then gradually increase to medium-high speed. Whip until the mixture forms soft peaks. This is the secret to a light, airy texture and will also cut your churning time in half.
- Churn: Pour the whipped mixture into your pre-frozen ice cream maker bowl. Churn according to the manufacturer’s instructions, typically for 20-30 minutes. The ice cream is ready when it has the consistency of soft serve and pulls away from the sides of the bowl.
- Harden (Optional): For a firmer ice cream, transfer the soft-serve consistency mixture to a freezer-safe, airtight container. Press a piece of parchment paper directly onto the surface to prevent ice crystals from forming, then seal with the lid. Freeze for at least 4 hours or until firm enough to scoop.
Tips for Success
- Keep Everything Cold: The key to smooth ice cream is a cold base and a cold machine. If your mixture warms up at any point, your final texture will be icy.
- Don’t Over-Churn: Stop the machine once the ice cream reaches a soft-serve consistency. Over-churning can cause the ice cream to become grainy and buttery.
- Flavor Infusions: To add a different flavor, gently heat the milk and cream with ingredients like mint leaves, coffee beans, or citrus zest. Let it steep for 30 minutes, then strain before proceeding with the recipe.
- Quality Matters: The flavor of your ice cream is only as good as your ingredients. Use high-quality cream, milk, and pure vanilla extract for the best taste.
Serving Suggestions
There are countless ways to enjoy this perfect vanilla ice cream. For a classic experience, serve scoops in crisp waffle cones or over warm, freshly baked brownies. For a delightful sundae, drizzle with warm hot fudge sauce and top with chopped nuts and a bright maraschino cherry. For an elegant adult dessert, pour a shot of rich espresso over a scoop for a decadent affogato. For a beautiful presentation, scoop into chilled bowls and garnish with a sprig of fresh mint and a dusting of gourmet sea salt. The clean, pure vanilla flavor is a magnificent partner for fresh summer berries or a slice of warm apple pie.
Storage Tips
Transfer your homemade ice cream to an airtight, freezer-safe container. To prevent ice crystals, press a layer of wax paper or parchment paper directly onto the surface of the ice cream before sealing the lid. Properly stored, your ice cream will maintain its best quality for up to 2 weeks in the freezer. After this time, it may begin to lose its creamy texture and develop freezer burn.
Can I make this ice cream without an ice cream machine? Yes! This is a no-churn ice cream recipe. To make it without a machine, simply whip the cream to stiff peaks, fold the mixture together, and pour it into a loaf pan. Freeze for 4-6 hours, stirring vigorously with a fork every hour to break up ice crystals.
What can I use instead of heavy cream? For a lighter version, you can use a 1:1 ratio of whole milk and heavy cream, but this will result in a less creamy, icier texture. For a dairy-free version, use full-fat canned coconut milk instead of both the cream and milk.
How can I add mix-ins like chocolate chips or fruit? After you have churned the ice cream to a soft-serve consistency, fold in your desired mix-ins by hand. This prevents the machine from breaking them down and ensures they are evenly distributed.
My ice cream is too hard. What happened? This usually happens if your mixture has too little sugar or fat. The sugar helps keep the ice cream soft. Another culprit could be freezer temperature; if your freezer is set very cold, it can make the ice cream rock-hard. Let it sit on the counter for 5-10 minutes before scooping.
Why is my ice cream icy? Icy ice cream is often a result of too much water in the mixture, large ice crystals forming during freezing, or not chilling the base enough before churning. Make sure to refrigerate your base for a full 2 hours, and follow the storage tip of pressing parchment paper onto the surface to prevent crystal growth.
Conclusion
Now it is your turn to experience the pure joy of homemade ice cream. This simple yet elegant recipe is your ticket to a world of creamy, custom-made desserts that will delight your family and friends. I am so excited for you to try it and see just how amazing it is. If you do make it, share a photo and tag us so we can celebrate your delicious success.
homemade ice cream recipe
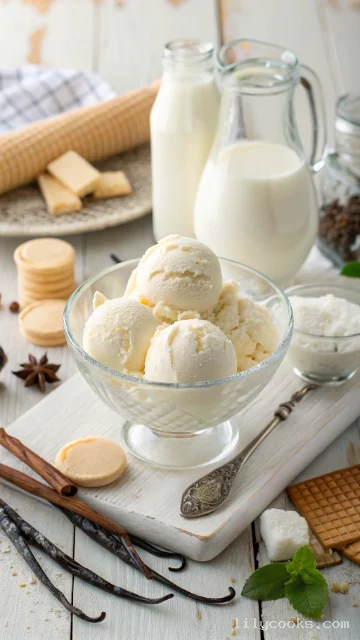
This classic homemade vanilla ice cream is all about a perfect, creamy texture and a pure, sweet flavor. The recipe uses a cooked custard base for ultimate smoothness and richness. While it requires a bit of patience for chilling, the hands-on time is minimal. This is the best homemade ice cream recipe for beginners and seasoned pros alike, promising a decadent result that is vastly superior to any store-bought version.
Ingredients
- 2 cups (480 ml) Heavy Cream: This is the heart of your ice cream, providing the rich fat content necessary for a creamy, dense texture and smooth mouthfeel. Do not substitute with light cream or half-and-half.
- 1 cup (240 ml) Whole Milk: Whole milk adds the right amount of liquid without making the mixture too heavy. It balances the richness of the heavy cream for the perfect consistency.
- 3/4 cup (150 g) Granulated Sugar: Sugar does more than sweeten; it lowers the freezing point, ensuring your ice cream stays scoopable and not rock-hard.
- 1 vanilla bean (or 1 tablespoon high-quality vanilla bean paste/extract): The star of the show. Using a real vanilla bean will give you those gorgeous little black specks and an intense, floral aroma that is unmatched. Vanilla bean paste is a fantastic alternative that offers both flavor and those signature specks.
- 6 large egg yolks: The secret to a velvety custard. The yolks act as an emulsifier, creating a smooth, cohesive base and contributing to the incredible richness. Use room-temperature eggs for easier tempering.
- 1/4 teaspoon fine sea salt: Salt is a crucial flavor enhancer that brightens the sweetness and deepens the vanilla notes.
Instructions
- Prepare the Base: In a medium, heavy-bottomed saucepan, combine the heavy cream, whole milk, and half of the sugar (about 6 tablespoons). Place the pan over medium heat and stir occasionally until the mixture is hot and steaming, with small bubbles forming around the edges.
- Temper the Eggs: While the cream mixture is heating, place the egg yolks and the remaining sugar in a large, heatproof bowl. Whisk vigorously until the mixture is pale yellow and thick, and forms a ribbon when you lift the whisk. This is the critical step. Slowly pour about a cup of the hot cream mixture into the egg yolk mixture, whisking constantly. This gradually raises the temperature of the eggs so they don't scramble. Pour the tempered egg mixture back into the saucepan with the remaining hot cream.
- Cook the Custard: Reduce the heat to medium-low. Cook the mixture, stirring constantly with a wooden spoon or a heatproof spatula. The key is to scrape the bottom and corners of the pan to prevent any bits from overcooking. Continue cooking until the custard thickens enough to coat the back of the spoon. You should be able to draw a clear line through it with your finger.
- Cool the Custard: Immediately remove the saucepan from the heat. Stir in the vanilla extract and the salt. Pour the hot custard through a fine-mesh strainer into a clean bowl to catch any accidental bits of cooked egg.
- Chill the Mixture: Place the bowl of custard in an ice bath to cool it down quickly, or simply cover the surface with plastic wrap to prevent a skin from forming and refrigerate for at least 4 hours or overnight. The mixture must be thoroughly chilled before churning.
- Churn the Ice Cream: Pour the chilled custard into your ice cream maker and churn according to the manufacturer's instructions. This usually takes about 20-25 minutes. The ice cream is ready when it has the consistency of soft-serve and has expanded in volume.[Image Generation Prompt: "A dynamic action shot of a person pouring a thick, creamy, yellow ice cream custard into a stainless steel ice cream maker. The mixture should be smooth and flowing, with steam or cold air visible. The focus is on the texture of the liquid."]
- Harden: Transfer the soft-serve ice cream to an airtight container. Press a piece of parchment paper directly onto the surface to prevent ice crystals from forming. Freeze for at least 4-6 hours, or until firm enough to scoop.