
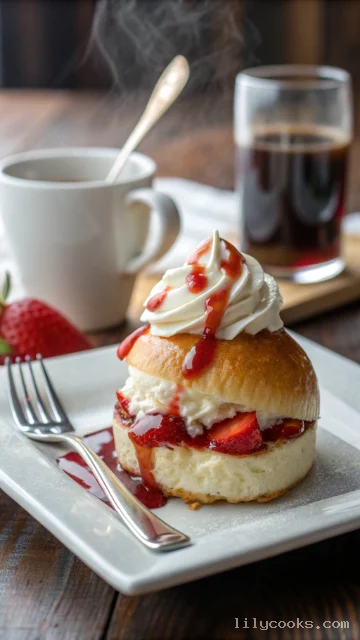
There’s something magical about a dessert that feels both nostalgic and brand new. These Philly Cheesecake Sliders take everything you love about classic creamy cheesecake and pack it into the most adorable, portable little bundles. Soft, sweet slider buns cradle a luscious cream cheese filling that’s perfectly tangy and smooth, topped with your favorite fruit preserves for that bright, jammy pop. They’re ridiculously easy to pull together,
Recipe Overview
These Philly Cheesecake Sliders deliver the rich, velvety texture of traditional cheesecake in a fun, handheld form. The filling is silky smooth with a subtle tang from the cream cheese, balanced by just the right amount of sweetness. The buns turn warm and slightly toasty in the oven, while the fruit preserves add a gorgeous swirl of color and a burst of fruity flavor in every bite. They come together in under 30 minutes with minimal fuss, making them an absolute winner for both beginner bakers and seasoned pros.
Ingredients List
Here’s everything you’ll need to create these delightful little desserts:
- 12 slider buns (Hawaiian or sweet rolls) – Their soft, slightly sweet texture is the perfect match for the creamy filling. They stay tender after baking and pull apart beautifully.
- 8 oz cream cheese, softened – This is the heart of the cheesecake filling. Make sure it’s at room temperature so it blends into a silky, lump-free mixture. Full-fat cream cheese gives the best richness, but low-fat works too.
- ½ cup powdered sugar – It dissolves instantly into the cream cheese, giving you that smooth, sweet base without any graininess.
- 1 teaspoon vanilla extract – Pure vanilla adds warmth and depth, elevating the simple filling into something truly special.
- ½ cup fruit preserves (strawberry, blueberry, raspberry, or your choice) – These add a bright, fruity contrast to the rich cream cheese. Choose your favorite or mix and match for a beautiful presentation.
- Whipped cream (optional, for serving) – A dollop on top adds an extra touch of elegance and creaminess.
Step-by-Step Instructions
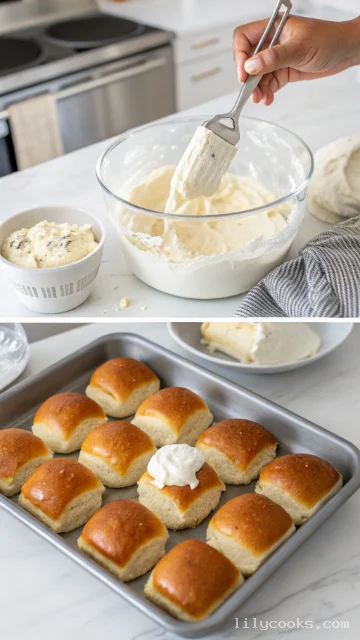
Step 1: Preheat and Prep
Preheat your oven to 350°F (175°C). Lightly grease a 9×13-inch baking dish or line it with parchment paper. This keeps the sliders from sticking and makes cleanup a breeze.
Step 2: Make the Cream Cheese Filling
In a medium mixing bowl, beat the softened cream cheese with an electric hand mixer until it’s completely smooth and free of lumps. Add the powdered sugar and vanilla extract, then continue beating until the mixture is light, fluffy, and velvety. Scrape down the sides of the bowl with a spatula to make sure everything is fully incorporated.
Step 3: Slice the Buns
Take your slider buns and slice them horizontally in one clean cut, keeping the top and bottom halves intact as a single slab. This makes assembly much faster and neater. Place the bottom half of the buns into your prepared baking dish.
Step 4: Assemble the Sliders
Spread the cream cheese mixture evenly over the bottom half of the buns, right to the edges. Next, spoon the fruit preserves over the cream cheese layer and gently swirl them together with the back of a spoon or a small spatula. Place the top half of the buns back on, pressing down lightly.
Step 5: Bake to Perfection
Cover the baking dish with aluminum foil. Bake for 15 minutes, then remove the foil and bake for an additional 5–10 minutes, until the sliders are heated through and the tops are lightly golden. Keep an eye on them during the last few minutes so they don’t overbake.
Step 6: Cool and Serve
Let the sliders cool in the dish for about 5–10 minutes before serving. This allows the filling to set slightly, making them easier to handle. Serve warm, topped with a swirl of whipped cream if desired.
Tips for Success
- Use room-temperature cream cheese. This is the golden rule for any cheesecake recipe. Cold cream cheese will leave you with a lumpy filling, no matter how long you beat it. Let it sit on the counter for at least 30 minutes before you start.
- Don’t overmix the filling. Beat just until smooth and combined. Overmixing can incorporate too much air, which might cause the filling to puff up and crack during baking.
- Keep the buns attached. Slicing the entire slab of buns in one go keeps everything aligned and makes assembly so much easier. No wrestling with individual buns!
- Watch the bake time. Every oven runs a little differently. Start checking your sliders around the 20-minute mark. You want them warm and the tops just golden, not dried out.
- Let them rest. Giving the sliders a few minutes to cool after baking helps the filling set up, so you get clean, beautiful slices instead of a messy spill.
Serving Suggestions
These Philly Cheesecake Sliders are showstoppers all on their own, but a few extra touches take them over the top. Arrange them on a beautiful wooden board or a vintage cake stand, and add a bowl of extra fruit preserves on the side for dipping. Fresh berries like strawberries, blueberries, or raspberries make a gorgeous, colorful garnish. For an extra indulgent twist, drizzle warm caramel or chocolate sauce over the top just before serving. Pair them with a cup of hot coffee, a glass of cold milk, or even a sparkling mocktail for a dessert spread that feels truly special.
Storage Tips
- Room Temperature: These sliders are best enjoyed fresh and warm, but they can sit at room temperature for up to 2 hours if you’re serving them at a party.
- Refrigeration: Store any leftovers in an airtight container in the refrigerator for up to 3 days. The cream cheese filling stays firm and delicious when chilled.
- Freezing: You can freeze these sliders for up to 2 months. Wrap them tightly in plastic wrap, then place them in a freezer-safe bag or container. To serve, thaw overnight in the refrigerator and warm them in a 300°F oven for about 10 minutes.
Can I make the filling ahead of time?
Yes. Prepare the cream cheese filling up to a day in advance and store it in an airtight container in the fridge. Let it come to room temperature and give it a quick stir before assembling.
What other toppings can I use?
The possibilities are endless. Try chocolate chips, crushed nuts, caramel drizzle, or even a sprinkle of cinnamon. For a citrusy twist, add a teaspoon of lemon or orange zest to the cream cheese mixture.
Can I use a different type of bread?
Absolutely. Brioche slider buns, dinner rolls, or even croissant-style rolls work beautifully. Just make sure they’re soft and slightly sweet for the best flavor contrast.
My filling turned out lumpy. What went wrong?
Your cream cheese was probably too cold. Always use softened cream cheese and beat it thoroughly before adding other ingredients. If lumps persist, press the mixture through a fine-mesh sieve.
How do I reheat leftovers?
Pop them in a 300°F oven for 5–7 minutes or microwave individual sliders for about 15–20 seconds. The oven method keeps the buns from getting soggy.
Can I make these gluten-free?
Yes. Simply use your favorite gluten-free slider buns or dinner rolls. The filling is naturally gluten-free, so the swap is easy.
Conclusion
These Philly Cheesecake Sliders are proof that great things really do come in small packages. They’re creamy, sweet, fruity, and utterly irresistible. I can’t wait for you to try them and see just how quickly they disappear from the plate. Whip up a batch for your next gathering, or surprise your family with a fun weekend treat. When you do, snap a photo and tag me – I love seeing your delicious creations. Happy baking!
philly cheesecake sliders recipe
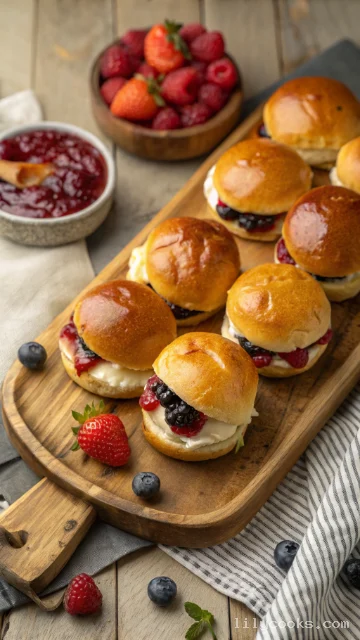
These Philly Cheesecake Sliders deliver the rich, velvety texture of traditional cheesecake in a fun, handheld form. The filling is silky smooth with a subtle tang from the cream cheese, balanced by just the right amount of sweetness. The buns turn warm and slightly toasty in the oven, while the fruit preserves add a gorgeous swirl of color and a burst of fruity flavor in every bite. They come together in under 30 minutes with minimal fuss, making them an absolute winner for both beginner bakers and seasoned pros.
Ingredients
- 12 slider buns (Hawaiian or sweet rolls) – Their soft, slightly sweet texture is the perfect match for the creamy filling. They stay tender after baking and pull apart beautifully.
- 8 oz cream cheese, softened – This is the heart of the cheesecake filling. Make sure it’s at room temperature so it blends into a silky, lump-free mixture. Full-fat cream cheese gives the best richness, but low-fat works too.
- ½ cup powdered sugar – It dissolves instantly into the cream cheese, giving you that smooth, sweet base without any graininess.
- 1 teaspoon vanilla extract – Pure vanilla adds warmth and depth, elevating the simple filling into something truly special.
- ½ cup fruit preserves (strawberry, blueberry, raspberry, or your choice) – These add a bright, fruity contrast to the rich cream cheese. Choose your favorite or mix and match for a beautiful presentation.
- Whipped cream (optional, for serving) – A dollop on top adds an extra touch of elegance and creaminess.
- Whipped cream (optional, for serving) – A dollop on top adds an extra touch of elegance and creaminess.
Instructions
Step 1: Preheat and PrepPreheat your oven to 350°F (175°C). Lightly grease a 9x13-inch baking dish or line it with parchment paper. This keeps the sliders from sticking and makes cleanup a breeze.
Step 2: Make the Cream Cheese FillingIn a medium mixing bowl, beat the softened cream cheese with an electric hand mixer until it’s completely smooth and free of lumps. Add the powdered sugar and vanilla extract, then continue beating until the mixture is light, fluffy, and velvety. Scrape down the sides of the bowl with a spatula to make sure everything is fully incorporated.
Step 3: Slice the BunsTake your slider buns and slice them horizontally in one clean cut, keeping the top and bottom halves intact as a single slab. This makes assembly much faster and neater. Place the bottom half of the buns into your prepared baking dish.
Step 4: Assemble the SlidersSpread the cream cheese mixture evenly over the bottom half of the buns, right to the edges. Next, spoon the fruit preserves over the cream cheese layer and gently swirl them together with the back of a spoon or a small spatula. Place the top half of the buns back on, pressing down lightly.
Step 5: Bake to PerfectionCover the baking dish with aluminum foil. Bake for 15 minutes, then remove the foil and bake for an additional 5–10 minutes, until the sliders are heated through and the tops are lightly golden. Keep an eye on them during the last few minutes so they don’t overbake.
Step 6: Cool and ServeLet the sliders cool in the dish for about 5–10 minutes before serving. This allows the filling to set slightly, making them easier to handle. Serve warm, topped with a swirl of whipped cream if desired.