
There’s something truly magical about the combination of sweet, juicy strawberries and creamy, vanilla-rich white chocolate. It’s a flavor pairing that whispers of warm afternoons, picnics in the park, and simple, happy moments. These Strawberry White Chocolate Cookies capture that very essence, transforming it into a soft, chewy, and utterly irresistible treat. They are the perfect balance of fruity brightness and decadent sweetness, making them a guaranteed hit for any occasion. So, preheat your oven, and prepare to fall in love with your new favorite cookie. This isn’t just a recipe; it’s an experience.
Recipe Overview
These cookies are a delightful study in contrasts. The vibrant, slightly tart bursts of strawberry are beautifully complemented by the sweet, mellow creaminess of white chocolate chips. The result is a thick, bakery-style cookie with a perfectly crisp, golden-brown edge and a wonderfully soft, tender center. This recipe is surprisingly straightforward, using simple ingredients to create a truly gourmet flavor. They are easy enough for a weekday baking session but impressive enough to share at your next gathering.
Ingredients List
- 2 ¾ cups (345g) All-Purpose Flour: Provides the structure for our cookies. Spoon and level it into your measuring cup for the most accurate results.
- 1 teaspoon Baking Soda: The essential leavening agent that helps our cookies rise and spread just a little for a perfect texture.
- ½ teaspoon Salt: A crucial flavor enhancer that balances the sweetness of the sugar and white chocolate.
- 1 cup (2 sticks / 226g) Unsalted Butter, softened to room temperature: Room-temperature butter creams perfectly with the sugar, creating a light and airy base.
- 1 ½ cups (300g) Granulated Sugar: Provides the primary sweetness and helps the cookies develop those beautiful, crispy edges.
- ¼ cup (50g) Light Brown Sugar, packed: Adds a touch of moisture and a hint of molasses flavor for a more complex sweetness.
- 2 large Eggs, room temperature: Room-temperature eggs emulsify more easily into the dough, ensuring a smooth, uniform mixture.
- 2 teaspoons Vanilla Extract: A flavor powerhouse that enhances the overall taste of the cookie.
- 1 cup (170g) Fresh Strawberries, diced into small, ¼-inch pieces: Fresh berries provide juicy, bright bursts of flavor. Make sure to pat them dry to remove excess moisture.
- ½ cup (85g) Freeze-Dried Strawberries, crushed: This is the secret to an intense, authentic strawberry flavor throughout the cookie without adding extra liquid. You can crush them in a bag with a rolling pin.
- 1 ½ cups (255g) White Chocolate Chips or Chunks: The sweet, creamy counterpart to the tart berries. Use high-quality chunks for the best melt-in-your-mouth experience.
Step-by-Step Instructions
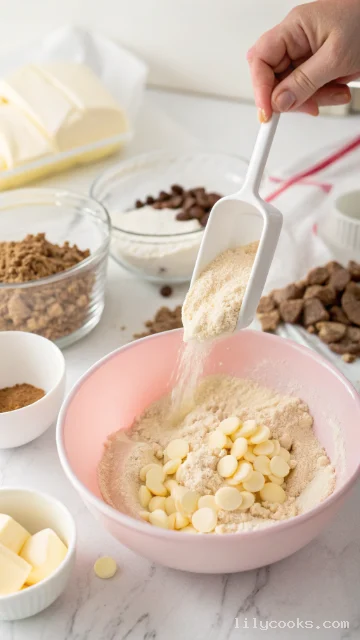
- Prep and Preheat: Start by preheating your oven to 375°F (190°C). Line two large baking sheets with parchment paper or silicone baking mats. This ensures your cookies don’t stick and promotes even baking.
- Whisk Dry Ingredients: In a medium-sized bowl, whisk together the all-purpose flour, baking soda, and salt. Set this bowl aside. This step is crucial for aerating the flour and evenly distributing the leavening agent.
- Cream Butter and Sugars: In a large mixing bowl, using an electric hand mixer or a stand mixer with the paddle attachment, beat the softened butter, granulated sugar, and brown sugar together until the mixture is light, fluffy, and pale in color. This should take about 2-3 minutes. The creaming process is what gives the cookies their tender, cake-like texture.
- Add Wet Ingredients: Add the eggs one at a time, beating well after each addition. Then, mix in the vanilla extract. Stop and scrape down the sides and bottom of the bowl with a rubber spatula to ensure everything is fully incorporated.
- Combine Dry and Wet: With the mixer on low speed, gradually add the dry ingredients to the wet ingredients. Mix until just combined. The dough will be slightly thick. Overmixing at this stage develops gluten, which can result in tough cookies. Mix until there are no visible streaks of flour left.
- Fold in the Goodies: Gently fold in the diced fresh strawberries, crushed freeze-dried strawberries, and white chocolate chips using your rubber spatula. Be careful not to overmix; the fresh berries are delicate and you want to keep them whole for those amazing juicy pockets.
- Scoop and Chill: Using a 1.5-tablespoon cookie scoop (or a rounded tablespoon), drop scoops of dough onto your prepared baking sheets, spacing them about 2 inches apart. For the best texture, chill the cookie dough on the baking sheets in the refrigerator for at least 30 minutes. Chilling solidifies the butter, preventing the cookies from spreading too much and deepening the flavors.
- Bake to Golden Perfection: Bake the chilled cookies for 10-12 minutes, or until the edges are just turning a light, golden brown. The centers will still appear slightly soft and underdone, but that’s exactly what you want for a chewy cookie.
- Cool and Set: Allow the cookies to cool on the baking sheet for 5-10 minutes. This is a crucial step; the cookies will continue to bake and set up as they cool. After 5-10 minutes, transfer them to a wire rack to cool completely.
Tips for Success
- Room Temperature is Key: Using room-temperature butter and eggs is essential for proper creaming and emulsification. If you’re short on time, you can cut the butter into small cubes and let it sit for 15-20 minutes, and place your eggs in a bowl of warm water for 5-10 minutes.
- Pat the Berries Dry: Fresh strawberries hold a lot of moisture. After dicing them, be sure to pat them thoroughly dry with a paper towel. This simple step prevents excess liquid from making your cookies soggy.
- Don’t Overmix: This is the golden rule of cookie baking. Once you add the flour, mix only until the ingredients are combined. Overmixing creates gluten, which yields a tough, cakey cookie instead of a soft, chewy one.
- The Freeze-Dried Secret: Don’t skip the freeze-dried strawberries! They are the key to that pop of authentic strawberry flavor in every single bite. If you can’t find them, you can increase the fresh strawberries to 1 ¼ cups, but be aware the cookies may spread a bit more.
- Test for Doneness: The visual cue of a golden-brown edge and a slightly soft center is the best indicator. You can also gently press the center of a cookie; it should spring back slightly but still feel soft. They will firm up as they cool.
Serving Suggestions
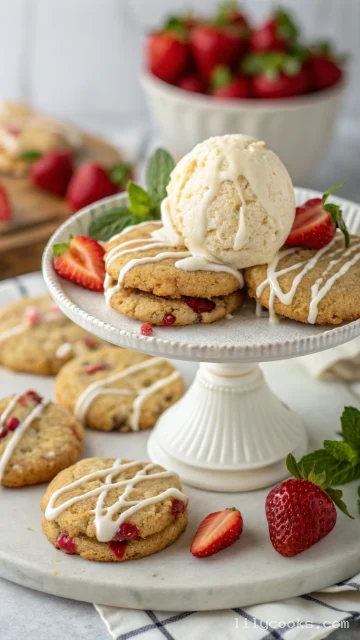
These Strawberry White Chocolate Cookies are a showstopper on their own, but you can elevate them for any occasion. Serve them warm with a tall glass of cold milk for the ultimate comfort snack. For a more elegant presentation, arrange them on a beautiful platter with a drizzle of melted white chocolate and a sprinkle of crushed freeze-dried strawberries. They make a fantastic ice cream sandwich base; simply place a scoop of vanilla or strawberry ice cream between two cookies. Pair them with a cup of refreshing iced tea or a hot cappuccino for a delightful afternoon pick-me-up.
Storage Tips
- Room Temperature: Store baked cookies in an airtight container at room temperature for up to 5 days. They will remain soft and chewy for the first few days.
- Freezing the Dough: This dough freezes beautifully. After scooping, place the dough balls on a baking sheet and freeze until solid. Then, transfer them to a freezer-safe zip-top bag. You can bake them straight from frozen; just add 2-3 extra minutes to the baking time.
- Freezing Baked Cookies: Baked cookies also freeze well. Place them in a single layer in a freezer-safe container or bag for up to 3 months.
Can I use fresh or frozen strawberries instead of freeze-dried?
Fresh or frozen strawberries have a high water content. Using them will add too much moisture to the dough, resulting in flat, soggy cookies. Freeze-dried strawberries are the best option for a concentrated flavor.
Can I use dark or milk chocolate instead of white chocolate?
Absolutely. Dark or milk chocolate chips or chunks make a fantastic substitute. They will create a richer, more traditional chocolate chip cookie flavor with a fruity twist.
Why is it important to chill the dough?
Chilling the dough solidifies the fat (butter). This prevents the cookies from spreading too much in the oven, leading to a thicker, chewier cookie. It also gives the flavors time to develop and deepen.
My cookies are too flat and spreading out. What happened?
This usually happens if the butter was too warm when mixed into the dough or if the dough wasn’t chilled. Melted butter must be cooled to room temperature, and chilling the dough is non-negotiable for this recipe.
Can I make this recipe gluten-free?
Yes, you can substitute the all-purpose flour with a high-quality 1:1 gluten-free baking flour blend. The texture might be slightly different, but they will still be delicious.
Conclusion
These Strawberry White Chocolate Cookies are pure joy in every single bite. They are simple enough for a Tuesday night treat and special enough for a celebration. The vibrant pink hue and the sweet, fruity aroma are irresistible. So, go ahead and preheat your oven. Whip up a batch of these delightful cookies and share them with the ones you love. You will be amazed at how quickly they disappear!
strawberry white chocolate cookies
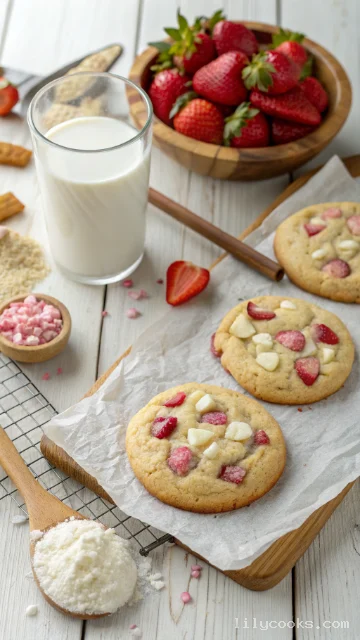
These cookies are a delightful study in contrasts. The vibrant, slightly tart bursts of strawberry are beautifully complemented by the sweet, mellow creaminess of white chocolate chips. The result is a thick, bakery-style cookie with a perfectly crisp, golden-brown edge and a wonderfully soft, tender center. This recipe is surprisingly straightforward, using simple ingredients to create a truly gourmet flavor. They are easy enough for a weekday baking session but impressive enough to share at your next gathering.
Ingredients
- 2 ¾ cups (345g) All-Purpose Flour: Provides the structure for our cookies. Spoon and level it into your measuring cup for the most accurate results.
- 1 teaspoon Baking Soda: The essential leavening agent that helps our cookies rise and spread just a little for a perfect texture.
- ½ teaspoon Salt: A crucial flavor enhancer that balances the sweetness of the sugar and white chocolate.
- 1 cup (2 sticks / 226g) Unsalted Butter, softened to room temperature: Room-temperature butter creams perfectly with the sugar, creating a light and airy base.
- 1 ½ cups (300g) Granulated Sugar: Provides the primary sweetness and helps the cookies develop those beautiful, crispy edges.
- ¼ cup (50g) Light Brown Sugar, packed: Adds a touch of moisture and a hint of molasses flavor for a more complex sweetness.
- 2 large Eggs, room temperature: Room-temperature eggs emulsify more easily into the dough, ensuring a smooth, uniform mixture.
- 2 teaspoons Vanilla Extract: A flavor powerhouse that enhances the overall taste of the cookie.
- 1 cup (170g) Fresh Strawberries, diced into small, ¼-inch pieces: Fresh berries provide juicy, bright bursts of flavor. Make sure to pat them dry to remove excess moisture.
- ½ cup (85g) Freeze-Dried Strawberries, crushed: This is the secret to an intense, authentic strawberry flavor throughout the cookie without adding extra liquid. You can crush them in a bag with a rolling pin.
- 1 ½ cups (255g) White Chocolate Chips or Chunks: The sweet, creamy counterpart to the tart berries. Use high-quality chunks for the best melt-in-your-mouth experience.
- 1 ½ cups (255g) White Chocolate Chips or Chunks: The sweet, creamy counterpart to the tart berries. Use high-quality chunks for the best melt-in-your-mouth experience.
Instructions
- Prep and Preheat: Start by preheating your oven to 375°F (190°C). Line two large baking sheets with parchment paper or silicone baking mats. This ensures your cookies don't stick and promotes even baking.
- Whisk Dry Ingredients: In a medium-sized bowl, whisk together the all-purpose flour, baking soda, and salt. Set this bowl aside. This step is crucial for aerating the flour and evenly distributing the leavening agent.
- Cream Butter and Sugars: In a large mixing bowl, using an electric hand mixer or a stand mixer with the paddle attachment, beat the softened butter, granulated sugar, and brown sugar together until the mixture is light, fluffy, and pale in color. This should take about 2-3 minutes. The creaming process is what gives the cookies their tender, cake-like texture.
- Add Wet Ingredients: Add the eggs one at a time, beating well after each addition. Then, mix in the vanilla extract. Stop and scrape down the sides and bottom of the bowl with a rubber spatula to ensure everything is fully incorporated.
- Combine Dry and Wet: With the mixer on low speed, gradually add the dry ingredients to the wet ingredients. Mix until just combined. The dough will be slightly thick. Overmixing at this stage develops gluten, which can result in tough cookies. Mix until there are no visible streaks of flour left.
- Fold in the Goodies: Gently fold in the diced fresh strawberries, crushed freeze-dried strawberries, and white chocolate chips using your rubber spatula. Be careful not to overmix; the fresh berries are delicate and you want to keep them whole for those amazing juicy pockets.
- Scoop and Chill: Using a 1.5-tablespoon cookie scoop (or a rounded tablespoon), drop scoops of dough onto your prepared baking sheets, spacing them about 2 inches apart. For the best texture, chill the cookie dough on the baking sheets in the refrigerator for at least 30 minutes. Chilling solidifies the butter, preventing the cookies from spreading too much and deepening the flavors.
- Bake to Golden Perfection: Bake the chilled cookies for 10-12 minutes, or until the edges are just turning a light, golden brown. The centers will still appear slightly soft and underdone, but that’s exactly what you want for a chewy cookie.
- Cool and Set: Allow the cookies to cool on the baking sheet for 5-10 minutes. This is a crucial step; the cookies will continue to bake and set up as they cool. After 5-10 minutes, transfer them to a wire rack to cool completely.