
There’s something truly magical about the combination of a crisp, buttery sugar cookie and smooth, decadent truffle. This Sugar Cookie Truffles recipe brings the best of both worlds together in a bite-sized, no-bake treat that is impossible to resist. Imagine the nostalgic flavor of your favorite bakery-style sugar cookie, rolled into a creamy ball, dipped in a luscious chocolate shell, and finished with a sprinkle of festive color.
Recipe Overview
This recipe captures the essence of classic sugar cookies, transforming them into elegant and irresistible truffles. Each bite offers a wonderfully soft and creamy center with a distinct buttery, vanilla-forward flavor, perfectly contrasted by a firm, snappy chocolate coating. This recipe is wonderfully approachable; with minimal ingredients and no baking required, it’s perfect for bakers of all skill levels. Preparation is a breeze, and the results are always impressive, yielding about 24-30 delectable truffles that are as beautiful as they are tasty. The preparation time is approximately 30 minutes of active work, with a chilling time of about 1 hour, making it a fantastic project for an afternoon or an easy dessert to prepare in advance for a party.
Ingredients List
1 ½ cups (180g) finely ground sugar cookie crumbs (from about 1 ½ sleeves of sugar cookies, or homemade)
4 oz (113g) full-fat cream cheese, softened to room temperature
¼ cup (57g) unsalted butter, softened to room temperature
1 teaspoon pure vanilla extract
¼ teaspoon fine sea salt
Pinch of ground nutmeg (optional, for a warm spice note)
12 oz (340g) high-quality white chocolate, chopped or in melting wafers (for the coating)
1 tablespoon vegetable oil or coconut oil (for thinning the chocolate if needed)
Festive sprinkles, sanding sugar, or crushed nuts for decoration (optional)
Step-by-Step Instructions
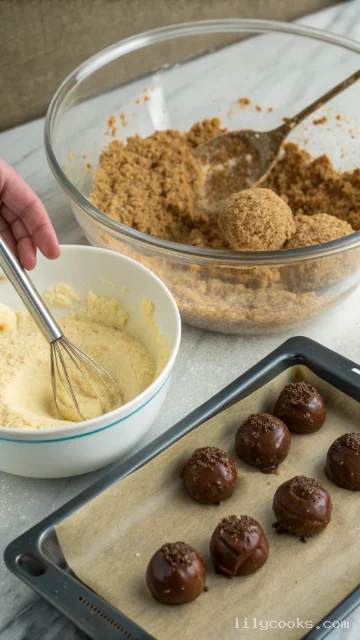
Step 1: Create the Cookie Crumbs
Place the sugar cookies into the bowl of a food processor. Pulse until they form fine, uniform crumbs. If you do not have a food processor, place the cookies in a large zip-top bag and crush them with a rolling pin until they reach a sandy consistency. You want no large chunks, as this will affect the smooth texture of the truffle filling.
Step 2: Mix the Filling
In a large mixing bowl, combine the softened cream cheese, vanilla extract, and a pinch of sea salt. Using an electric mixer on medium speed, beat until the mixture is completely smooth and free of lumps. Add the cookie crumbs to the cream cheese mixture. Beat on low speed until all the crumbs are fully incorporated and a cohesive, dough-like mixture forms. The mixture should be pliable and easy to roll.
Step 3: Shape the Truffles
Scoop out portions of the mixture using a small cookie scoop or a tablespoon to ensure uniform size. Roll each portion between your palms to form a smooth, round ball about 1-inch in diameter. Place the formed truffle balls on a baking sheet lined with parchment paper. Once all the balls are rolled, place the baking sheet in the refrigerator for at least 30 minutes. This chilling step is essential; it firms up the centers, making them much easier to dip in the melted chocolate without falling apart.
Step 4: Melt the Chocolate
While the truffles chill, prepare the chocolate coating. Place the melting chocolate in a microwave-safe bowl. Microwave in 30-second intervals, stirring vigorously after each interval, until the chocolate is completely smooth and melted. Be careful not to overheat the chocolate, as it can become thick and grainy. If the chocolate seems too thick for dipping, stir in 1 teaspoon of coconut oil or vegetable shortening to thin it out.
Step 5: Dip the Truffles
Remove the chilled truffle balls from the refrigerator. Using a fork, a dipping tool, or two spoons, submerge one truffle at a time into the melted chocolate. Gently tap the tool on the edge of the bowl to allow any excess chocolate to drip off. Place the coated truffle back onto the parchment-lined baking sheet. Immediately sprinkle with your choice of decorative toppings before the chocolate sets. Repeat this process with the remaining truffles.
Step 6: Let the Chocolate Set
Allow the chocolate-coated truffles to sit at room temperature for about 15-20 minutes, or until the chocolate hardens completely. You can speed up the process by placing the baking sheet in the refrigerator for about 5-10 minutes.
Tips for Success
For the smoothest dough, ensure your cream cheese and butter are at room temperature. Cold ingredients will create a lumpy mixture. Do not overmix the dough once the crumbs are added; mix just until a dough forms to keep the truffles tender. Chilling times are crucial; don’t skip them, as warm dough will be too sticky to roll and will cause the chocolate to slide off during dipping. When melting chocolate, be patient and use low heat. High heat can cause white chocolate to seize and become grainy. If you prefer a different coating, dark or milk chocolate works wonderfully as a substitute for white chocolate.
Serving Suggestions
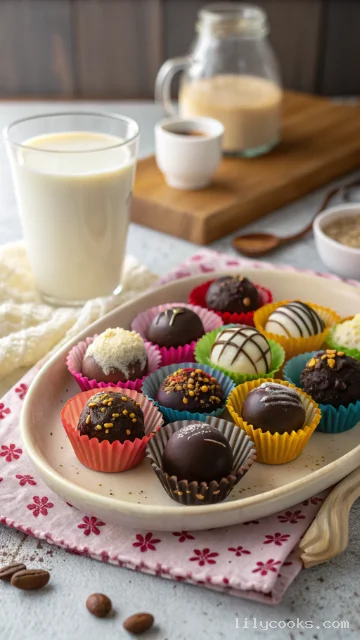
These truffles are perfect for a variety of occasions. For a festive party, arrange them on a tiered stand with other colorful confections. Package a few in a decorative box or cellophane bag tied with a ribbon for a thoughtful homemade gift. For a simple yet elegant dessert, serve them alongside fresh berries and a cup of strong coffee or a glass of chilled dessert wine like Moscato.
Storage Tips
Room Temperature: Store finished truffles in an airtight container at room temperature for up to 3 days. Keep them away from direct sunlight or heat.
Refrigeration: For longer storage, place truffles in a single layer in an airtight container and refrigerate for up to 2 weeks. The chocolate coating may develop a slight “bloom” (white spots) from the cold, but they will still taste delicious.
Freezing: These truffles freeze beautifully. Place them in a single layer on a baking sheet until solid, then transfer to a freezer-safe bag or container. They can be frozen for up to 3 months. Thaw them overnight in the refrigerator before serving.
Can I use homemade sugar cookies for the crumbs?
Absolutely. Homemade sugar cookies will make these truffles even more special. Just ensure they are completely baked, cooled, and have a crisp texture so they can be ground into fine crumbs.
What if my melted white chocolate is too thick to dip?
Add a teaspoon of vegetable oil, coconut oil, or a high-quality shortening to the melted chocolate to thin it out. Stir until it reaches a smooth, fluid consistency.
Can I make these truffles gluten-free?
Yes, simply use your favorite gluten-free sugar cookies to create the cookie crumbs. The rest of the ingredients are naturally gluten-free.
Why did my truffle centers crack when I dipped them?
This usually happens if the truffle center is too cold and the chocolate is too hot, or if there’s a significant temperature difference between the two. Let the truffle balls sit at room temperature for 5-10 minutes after coming out of the freezer before dipping.
What other flavor variations can I try?
This is a great base recipe for experimentation. You can add a teaspoon of almond extract instead of vanilla, or fold in some lemon or orange zest with the wet ingredients. Mixing mini chocolate chips into the dough before chilling also adds a wonderful texture.
Conclusion
I hope this Sugar Cookie Truffles recipe becomes a beloved favorite in your kitchen, just as it is in mine. The pure joy of creating something so beautiful and delicious from such simple ingredients is a gift. I can’t wait for you to try them and see the smiles they bring. If you make this recipe, please share your photos and tag me – I absolutely love seeing your creations!
Sugar Cookie Truffles Recipe
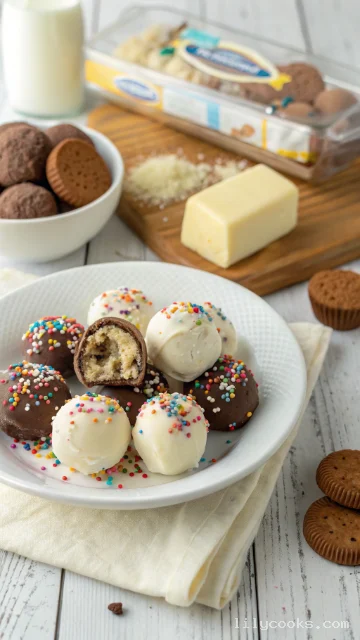
This recipe captures the essence of classic sugar cookies, transforming them into elegant and irresistible truffles. Each bite offers a wonderfully soft and creamy center with a distinct buttery, vanilla-forward flavor, perfectly contrasted by a firm, snappy chocolate coating. This recipe is wonderfully approachable; with minimal ingredients and no baking required, it’s perfect for bakers of all skill levels. Preparation is a breeze, and the results are always impressive, yielding about 24-30 delectable truffles that are as beautiful as they are tasty. The preparation time is approximately 30 minutes of active work, with a chilling time of about 1 hour, making it a fantastic project for an afternoon or an easy dessert to prepare in advance for a party.
Ingredients
- 1 ½ cups (180g) finely ground sugar cookie crumbs (from about 1 ½ sleeves of sugar cookies, or homemade)
- 4 oz (113g) full-fat cream cheese, softened to room temperature
- ¼ cup (57g) unsalted butter, softened to room temperature
- 1 teaspoon pure vanilla extract
- ¼ teaspoon fine sea salt
- Pinch of ground nutmeg (optional, for a warm spice note)
- 12 oz (340g) high-quality white chocolate, chopped or in melting wafers (for the coating)
- 1 tablespoon vegetable oil or coconut oil (for thinning the chocolate if needed)
- Festive sprinkles, sanding sugar, or crushed nuts for decoration (optional)
Instructions
Step 1: Create the Cookie CrumbsPlace the sugar cookies into the bowl of a food processor. Pulse until they form fine, uniform crumbs. If you do not have a food processor, place the cookies in a large zip-top bag and crush them with a rolling pin until they reach a sandy consistency. You want no large chunks, as this will affect the smooth texture of the truffle filling.
Step 2: Mix the FillingIn a large mixing bowl, combine the softened cream cheese, vanilla extract, and a pinch of sea salt. Using an electric mixer on medium speed, beat until the mixture is completely smooth and free of lumps. Add the cookie crumbs to the cream cheese mixture. Beat on low speed until all the crumbs are fully incorporated and a cohesive, dough-like mixture forms. The mixture should be pliable and easy to roll.
Step 3: Shape the TrufflesScoop out portions of the mixture using a small cookie scoop or a tablespoon to ensure uniform size. Roll each portion between your palms to form a smooth, round ball about 1-inch in diameter. Place the formed truffle balls on a baking sheet lined with parchment paper. Once all the balls are rolled, place the baking sheet in the refrigerator for at least 30 minutes. This chilling step is essential; it firms up the centers, making them much easier to dip in the melted chocolate without falling apart.
Step 4: Melt the ChocolateWhile the truffles chill, prepare the chocolate coating. Place the melting chocolate in a microwave-safe bowl. Microwave in 30-second intervals, stirring vigorously after each interval, until the chocolate is completely smooth and melted. Be careful not to overheat the chocolate, as it can become thick and grainy. If the chocolate seems too thick for dipping, stir in 1 teaspoon of coconut oil or vegetable shortening to thin it out.
Step 5: Dip the TrufflesRemove the chilled truffle balls from the refrigerator. Using a fork, a dipping tool, or two spoons, submerge one truffle at a time into the melted chocolate. Gently tap the tool on the edge of the bowl to allow any excess chocolate to drip off. Place the coated truffle back onto the parchment-lined baking sheet. Immediately sprinkle with your choice of decorative toppings before the chocolate sets. Repeat this process with the remaining truffles.
Step 6: Let the Chocolate SetAllow the chocolate-coated truffles to sit at room temperature for about 15-20 minutes, or until the chocolate hardens completely. You can speed up the process by placing the baking sheet in the refrigerator for about 5-10 minutes.